使用 MMDetection 和 Label-Studio 进行半自动目标检测标注
标注数据是一个耗时且费力的任务。本文介绍了如何使用 MMDetection 中的 RTMDet 算法结合 Label-Studio 软件进行半自动标注。具体来说,使用 RTMDet 预测图像标注,然后使用 Label-Studio 对标注进行细化。社区用户可以参考此过程和方法,并将其应用于其他领域。
RTMDet:RTMDet 是由 OpenMMLab 开发的高精度单阶段目标检测算法,在 MMDetection 目标检测工具箱中开源。其开源许可证为 Apache 2.0,工业用户可以自由使用,不受限制。
Label Studio 是一款优秀的标注软件,涵盖了图像分类、目标检测和分割等领域的数据集标注功能。
在本文中,我们将使用 猫 图像进行半自动标注。
环境配置
首先,您需要创建一个虚拟环境,然后安装 PyTorch 和 MMCV。在本文中,我们将指定 PyTorch 和 MMCV 的版本。接下来,您可以使用以下步骤安装 MMDetection、Label-Studio 和 label-studio-ml-backend
创建虚拟环境
conda create -n rtmdet python=3.9 -y
conda activate rtmdet
安装 PyTorch
# Linux and Windows CPU only
pip install torch==1.10.1+cpu torchvision==0.11.2+cpu torchaudio==0.10.1 -f https://download.pytorch.org/whl/cpu/torch_stable.html
# Linux and Windows CUDA 11.3
pip install torch==1.10.1+cu113 torchvision==0.11.2+cu113 torchaudio==0.10.1 -f https://download.pytorch.org/whl/cu113/torch_stable.html
# OSX
pip install torch==1.10.1 torchvision==0.11.2 torchaudio==0.10.1
安装 MMCV
pip install -U openmim
mim install "mmcv>=2.0.0"
# Installing mmcv will automatically install mmengine
安装 MMDetection
git clone https://github.com/open-mmlab/mmdetection
cd mmdetection
pip install -v -e .
安装 Label-Studio 和 label-studio-ml-backend
# Installing Label-Studio may take some time, if the version is not found, please use the official source
pip install label-studio==1.7.2
pip install label-studio-ml==1.0.9
下载 rtmdet 权重
cd path/to/mmetection
mkdir work_dirs
cd work_dirs
wget https://download.openmmlab.com/mmdetection/v3.0/rtmdet/rtmdet_m_8xb32-300e_coco/rtmdet_m_8xb32-300e_coco_20220719_112220-229f527c.pth
启动服务
启动 RTMDet 后端推理服务
cd path/to/mmetection

label-studio-ml start projects/LabelStudio/backend_template --with \
config_file=configs/rtmdet/rtmdet_m_8xb32-300e_coco.py \
checkpoint_file=./work_dirs/rtmdet_m_8xb32-300e_coco_20220719_112220-229f527c.pth \
device=cpu \
--port 8003
# Set device=cpu to use CPU inference, and replace cpu with cuda:0 to use GPU inference.
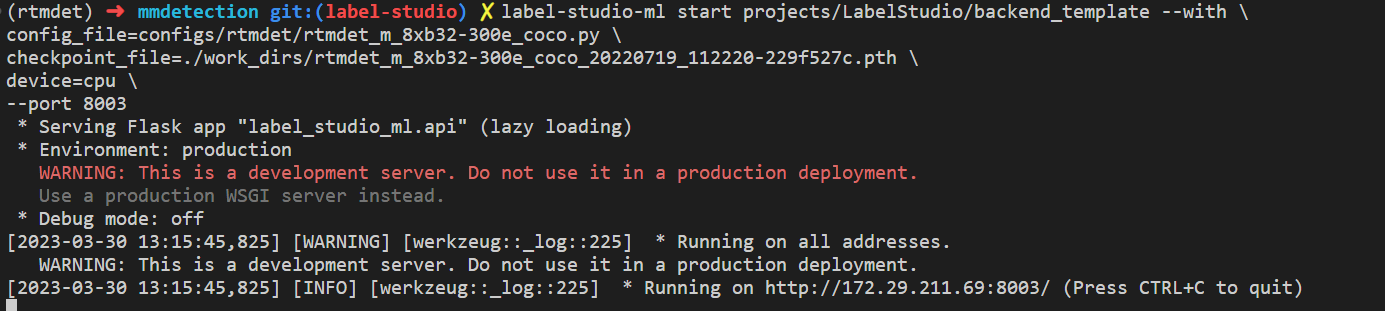
RTMDet 后端推理服务现已启动。要在 Label-Studio Web 系统中配置它,请使用 https://:8003 作为后端推理服务。
现在,启动 Label-Studio Web 服务
label-studio start
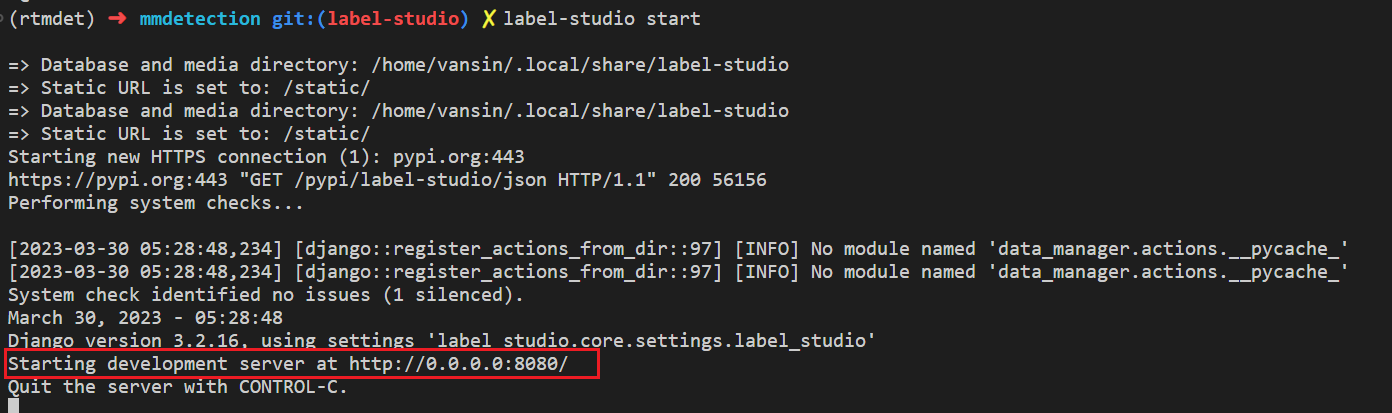
打开您的 Web 浏览器,转到 https://:8080/ 以查看 Label-Studio 界面。

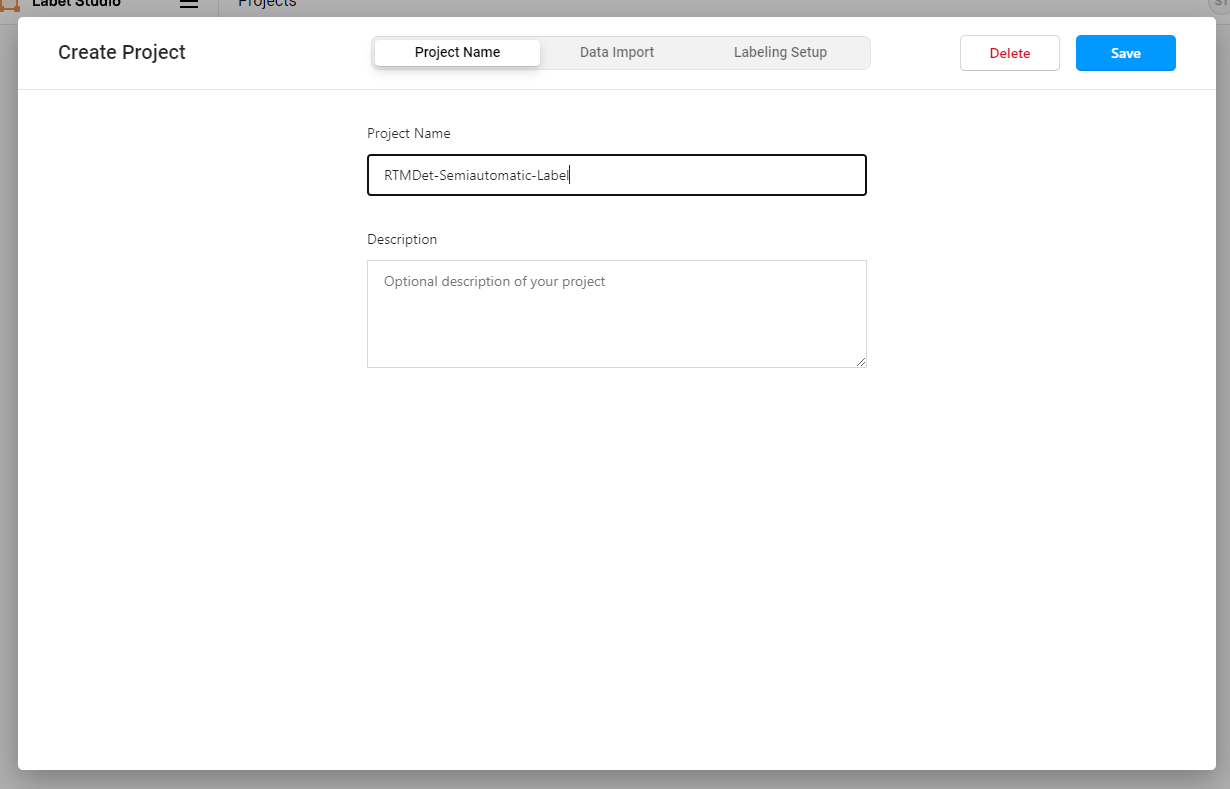
注册用户,然后创建一个 RTMDet-Semiautomatic-Label 项目。
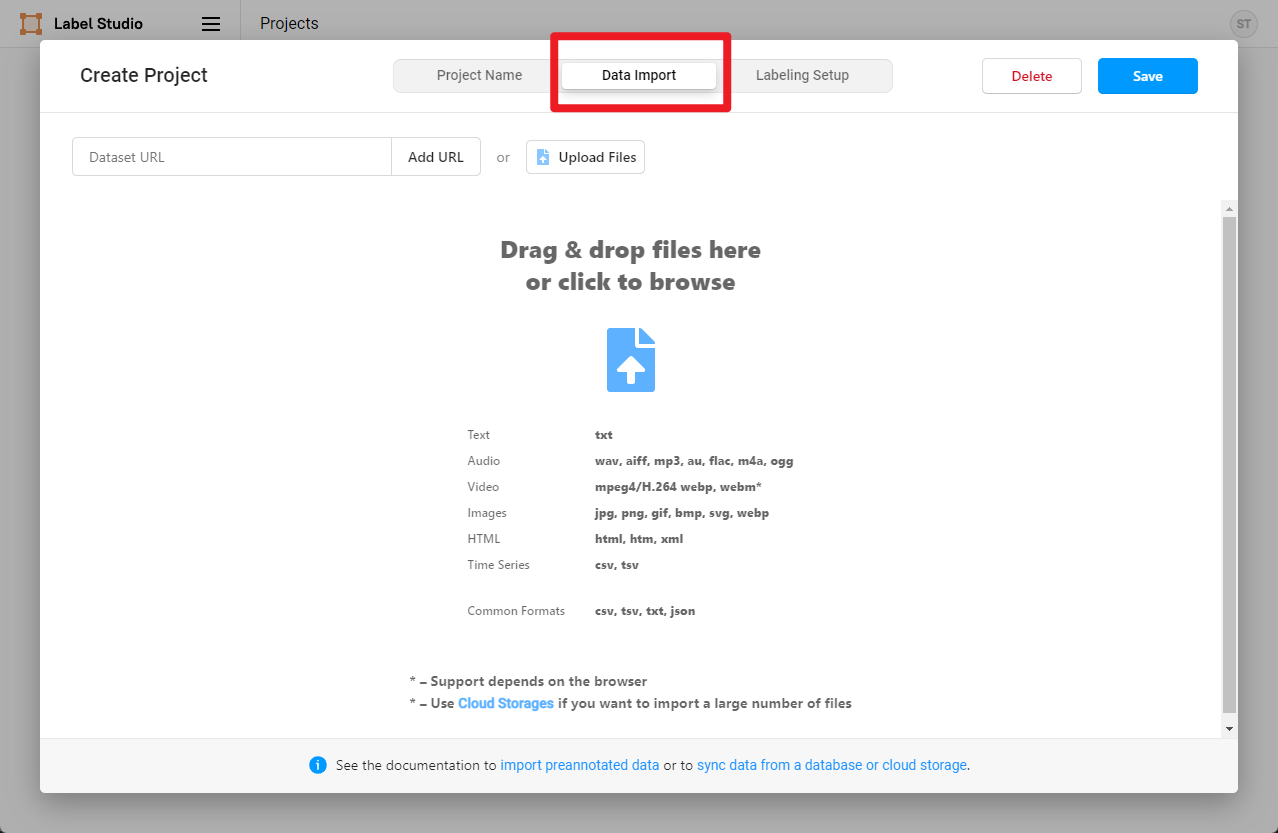
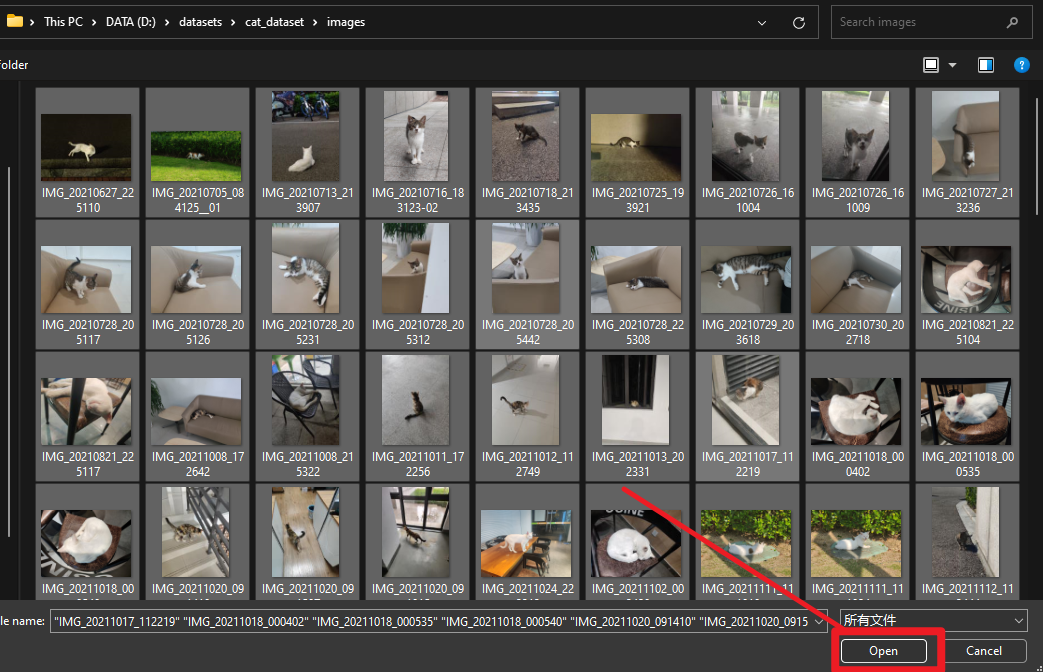
通过运行以下命令下载示例猫图像,并使用“数据导入”按钮导入它们
cd path/to/mmetection
mkdir data && cd data

wget https://download.openmmlab.com/mmyolo/data/cat_dataset.zip && unzip cat_dataset.zip
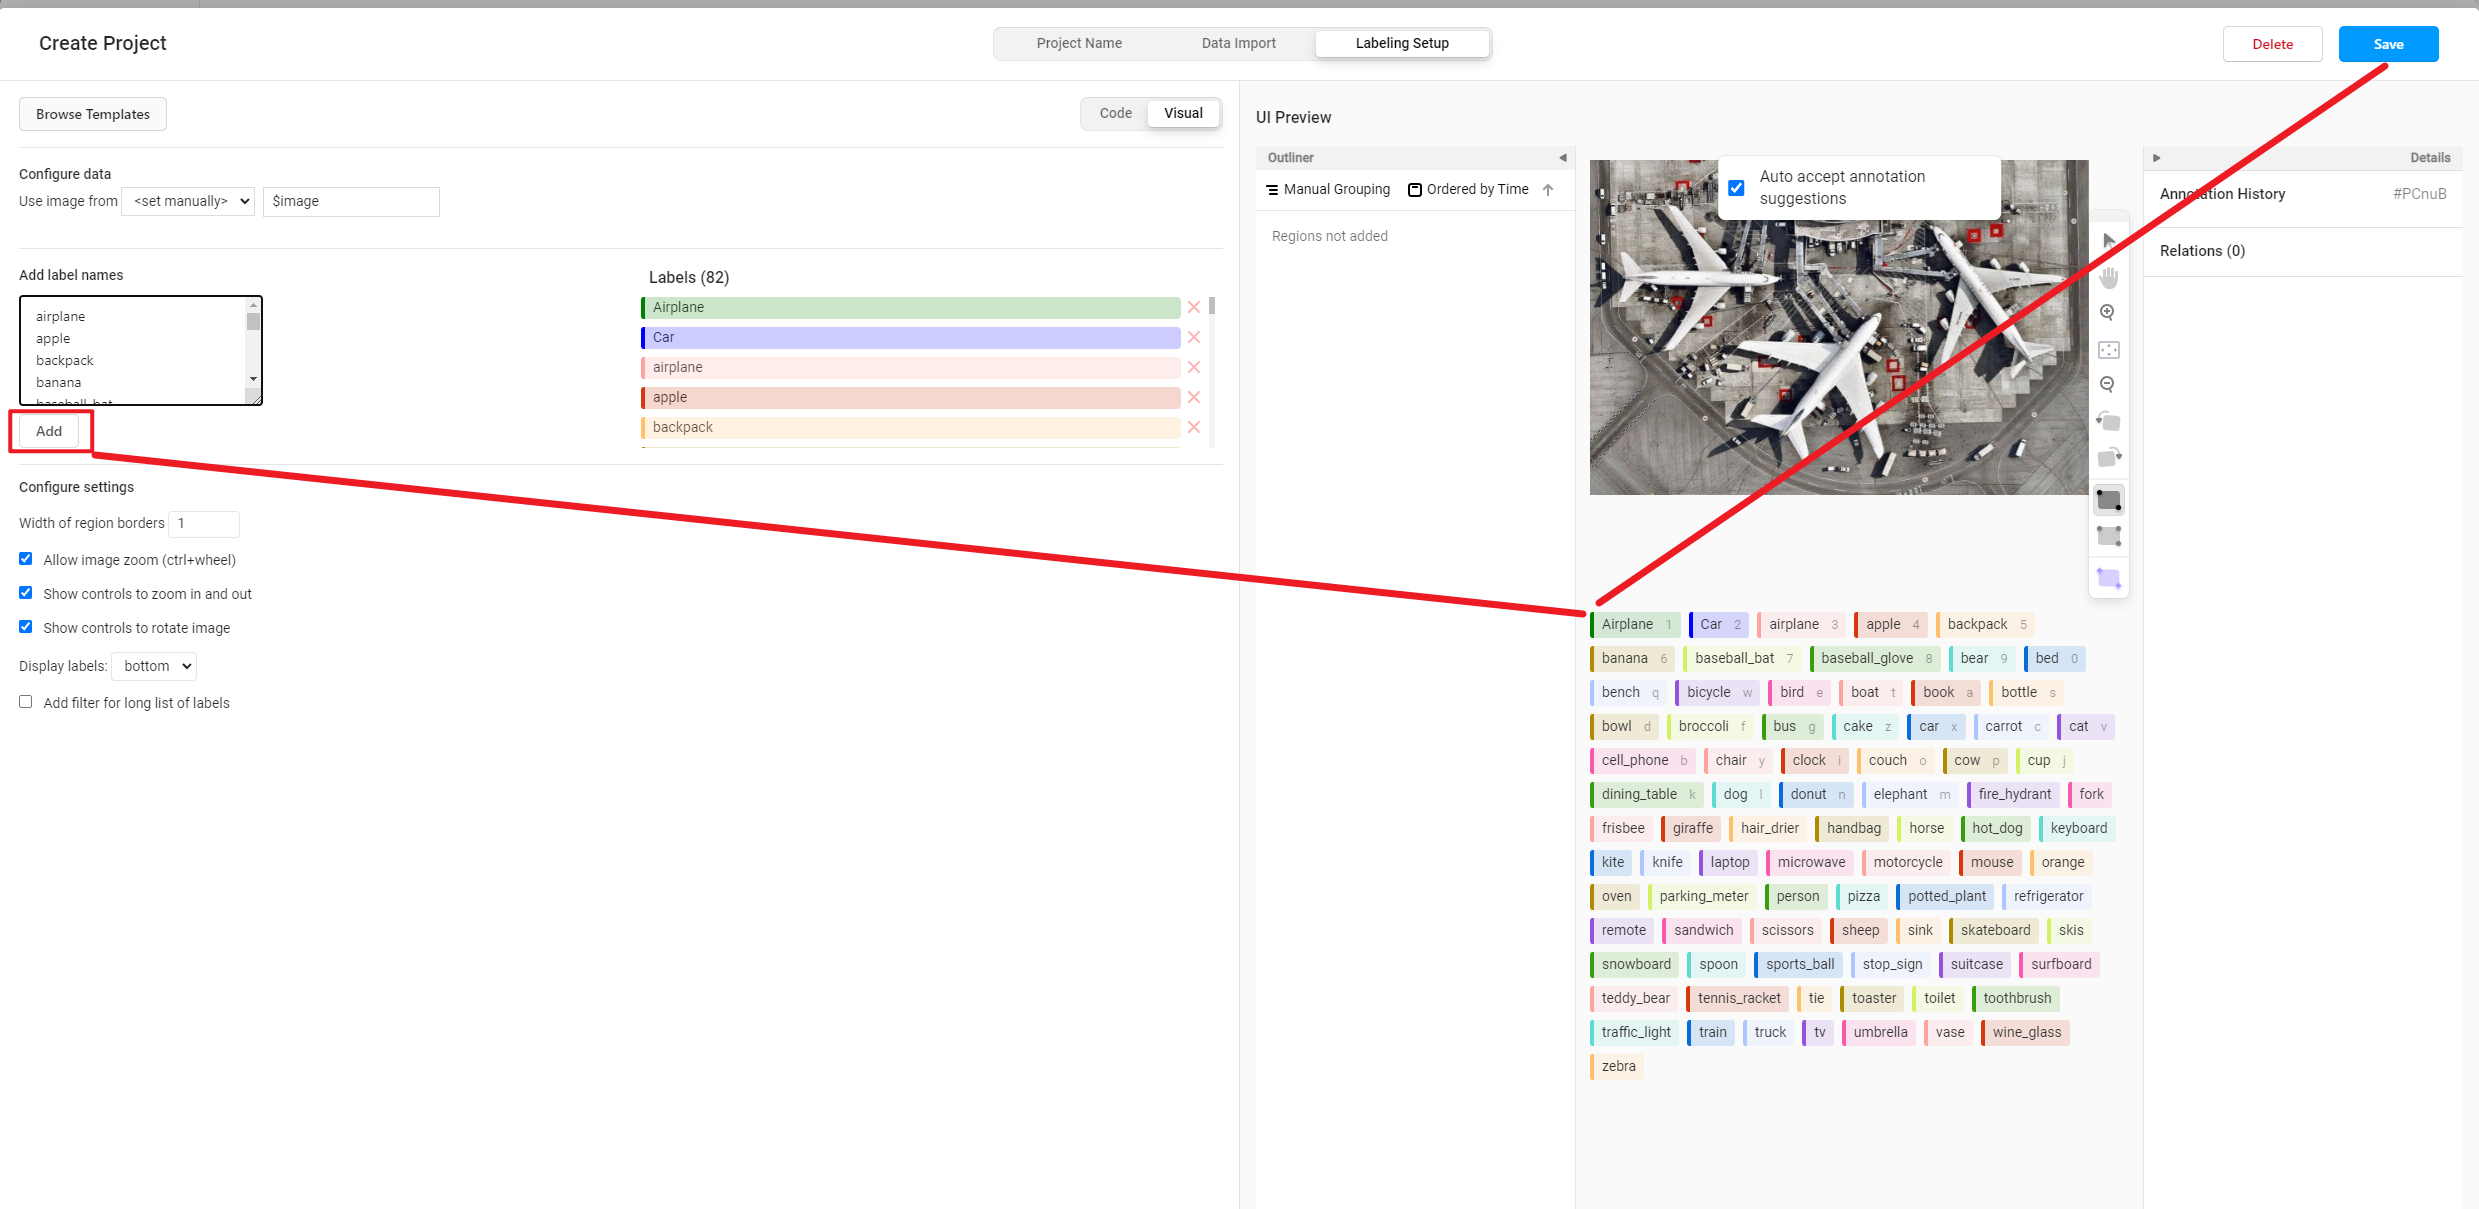
然后,选择“带有边界框的目标检测”模板。

airplane
apple
backpack
banana
baseball_bat
baseball_glove
bear
bed
bench
bicycle
bird
boat
book
bottle
bowl
broccoli
bus
cake
car
carrot
cat
cell_phone
chair
clock
couch
cow
cup
dining_table
dog
donut
elephant
fire_hydrant
fork
frisbee
giraffe
hair_drier
handbag
horse
hot_dog
keyboard
kite
knife
laptop
microwave
motorcycle
mouse
orange
oven
parking_meter
person
pizza
potted_plant
refrigerator
remote
sandwich
scissors
sheep
sink
skateboard
skis
snowboard
spoon
sports_ball
stop_sign
suitcase
surfboard
teddy_bear
tennis_racket
tie
toaster
toilet
toothbrush
traffic_light
train
truck
tv
umbrella
vase
wine_glass
zebra
然后,复制并添加以上类别到 Label-Studio,然后点击“保存”。
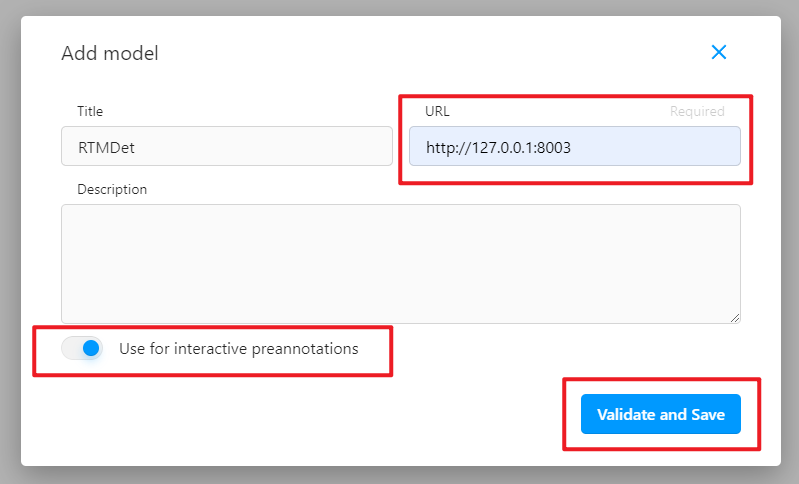
在“设置”中,点击“添加模型”以添加 RTMDet 后端推理服务。

点击“验证”和“保存”,然后点击“开始标注”。
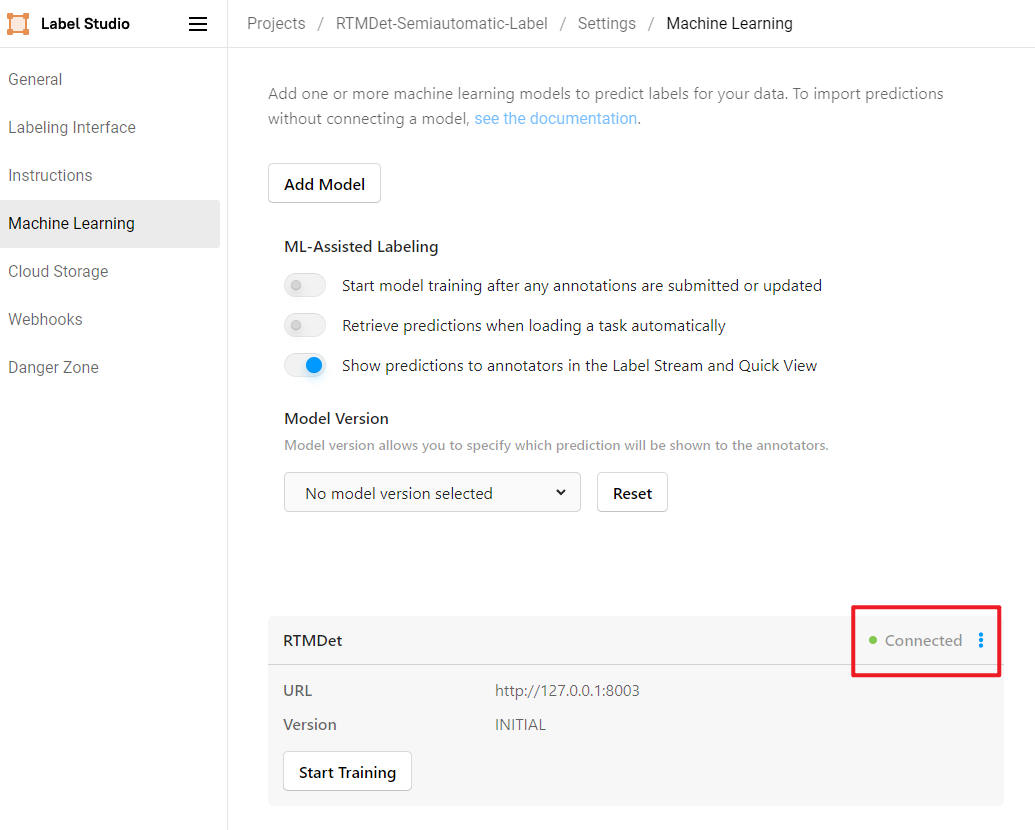
如果您看到以下所示的“已连接”,则表明后端推理服务已成功添加。
启动半自动标注
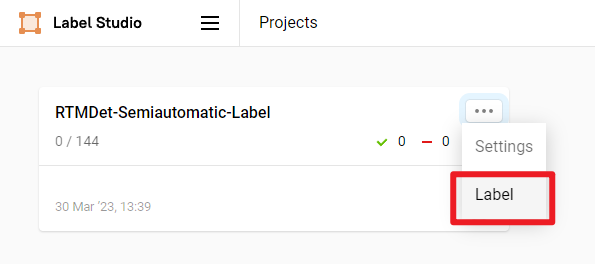
点击“标注”开始标注。
我们可以看到,RTMDet 后端推理服务已成功返回预测结果,并在图像上显示它们。但是,我们注意到猫的预测边界框有点太大,不太准确。
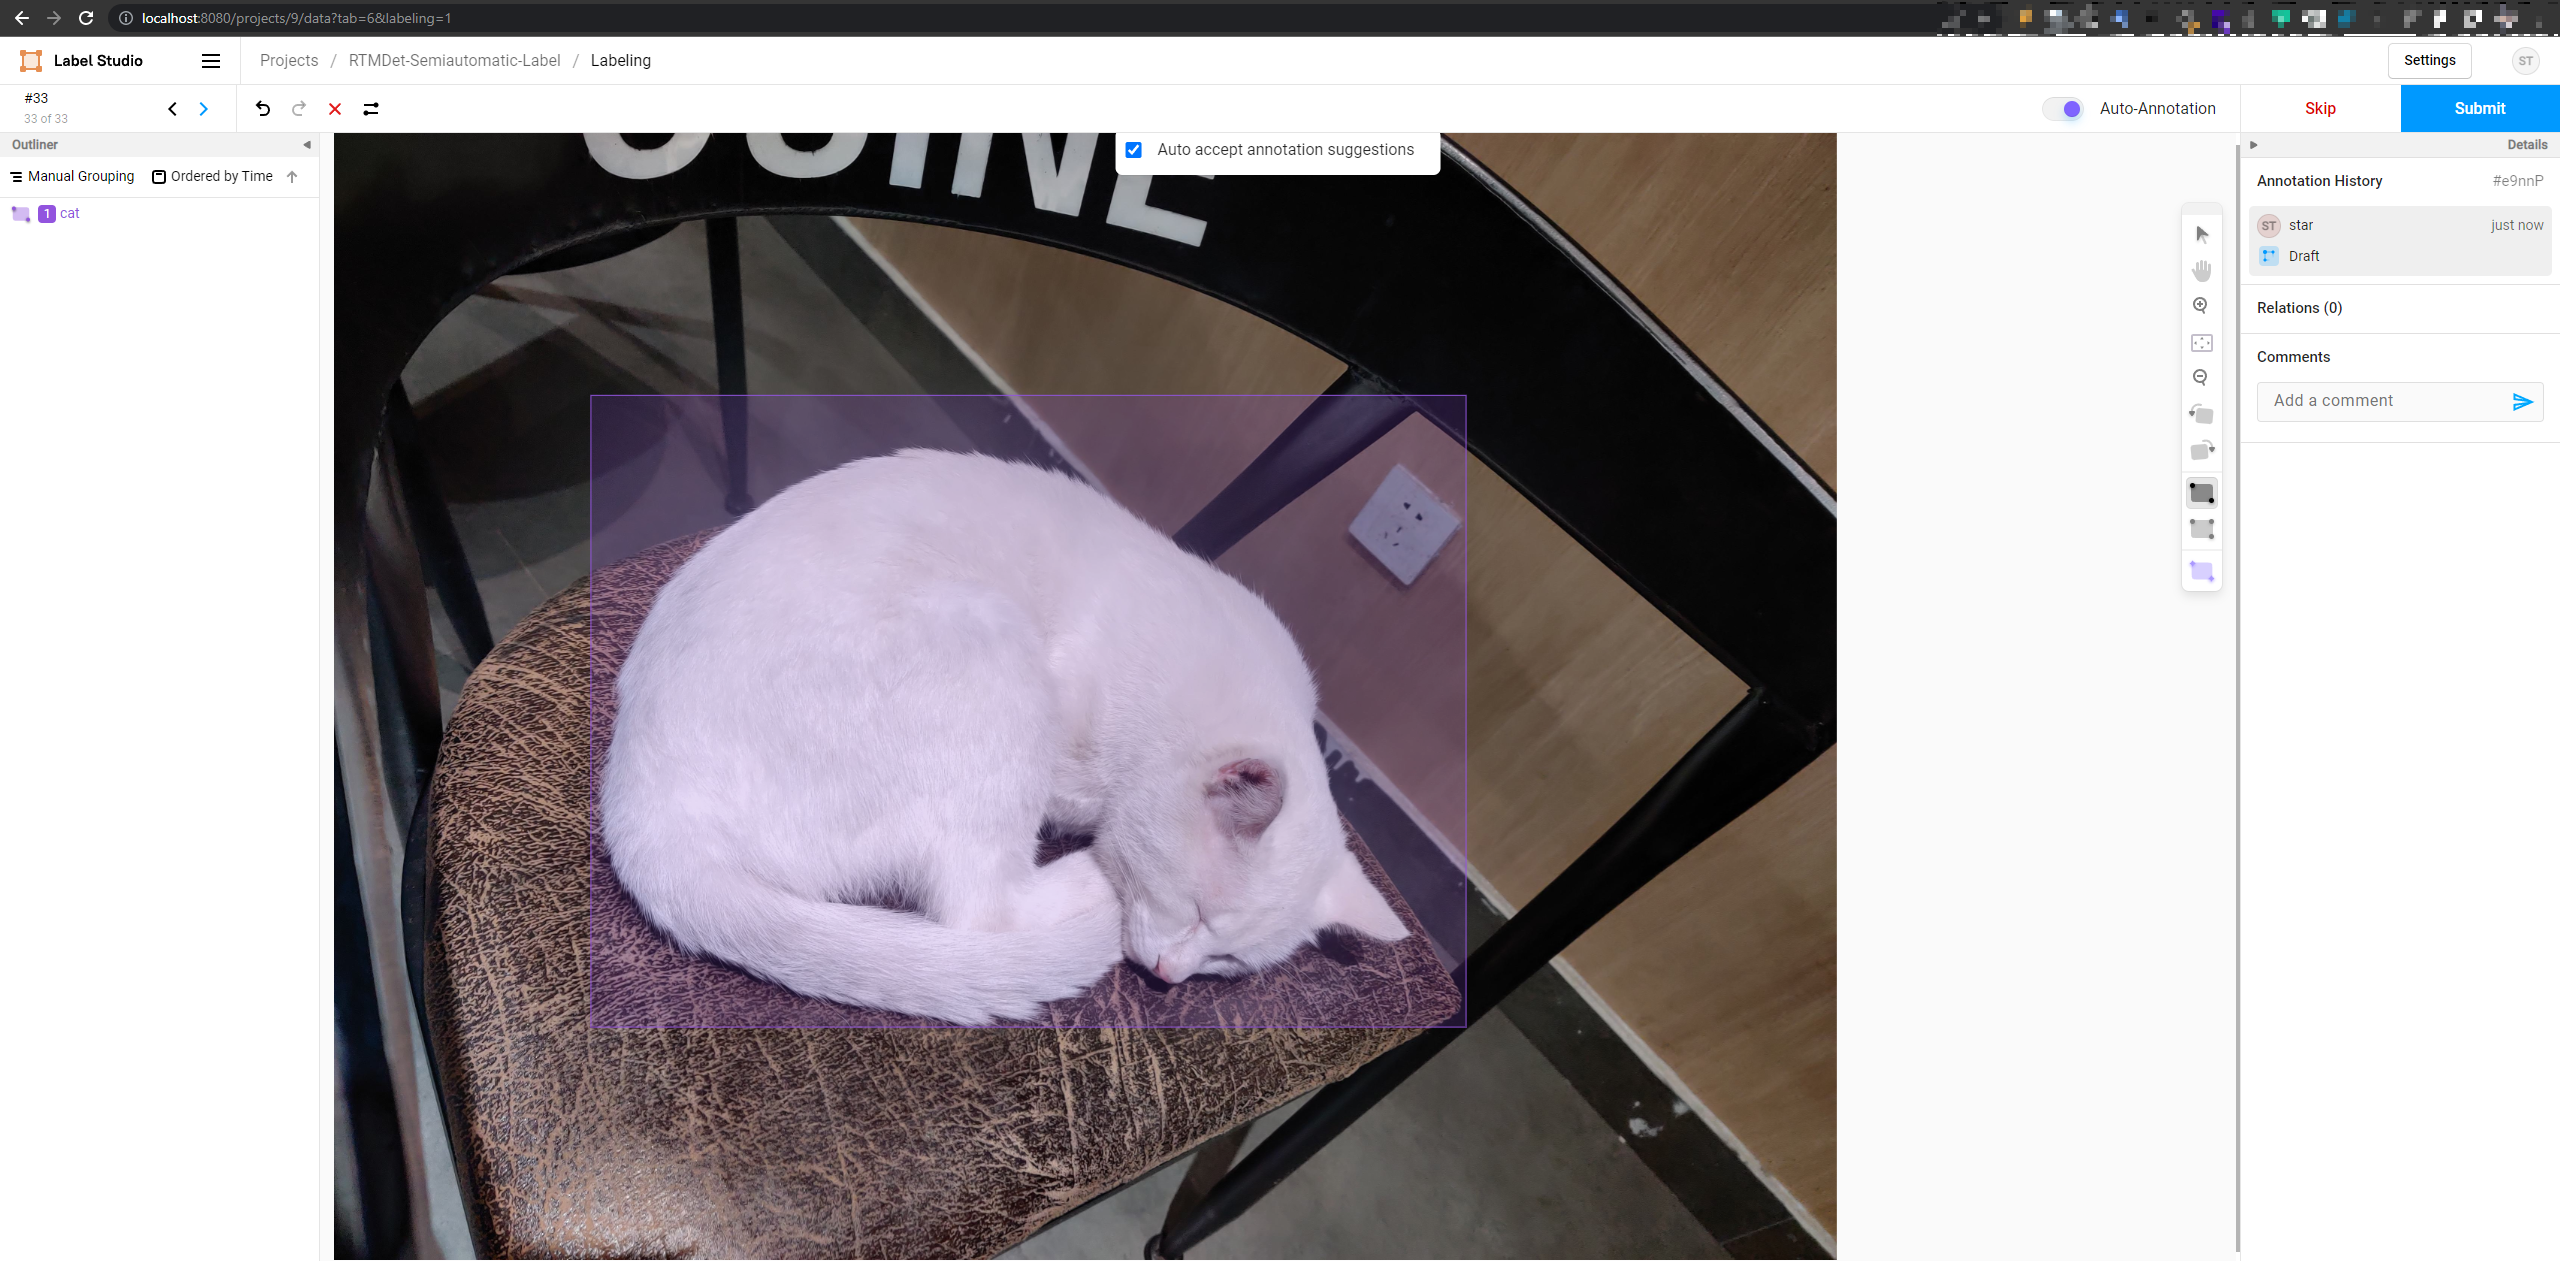
我们手动调整猫边界框的位置,然后点击“提交”以完成此图像的标注。

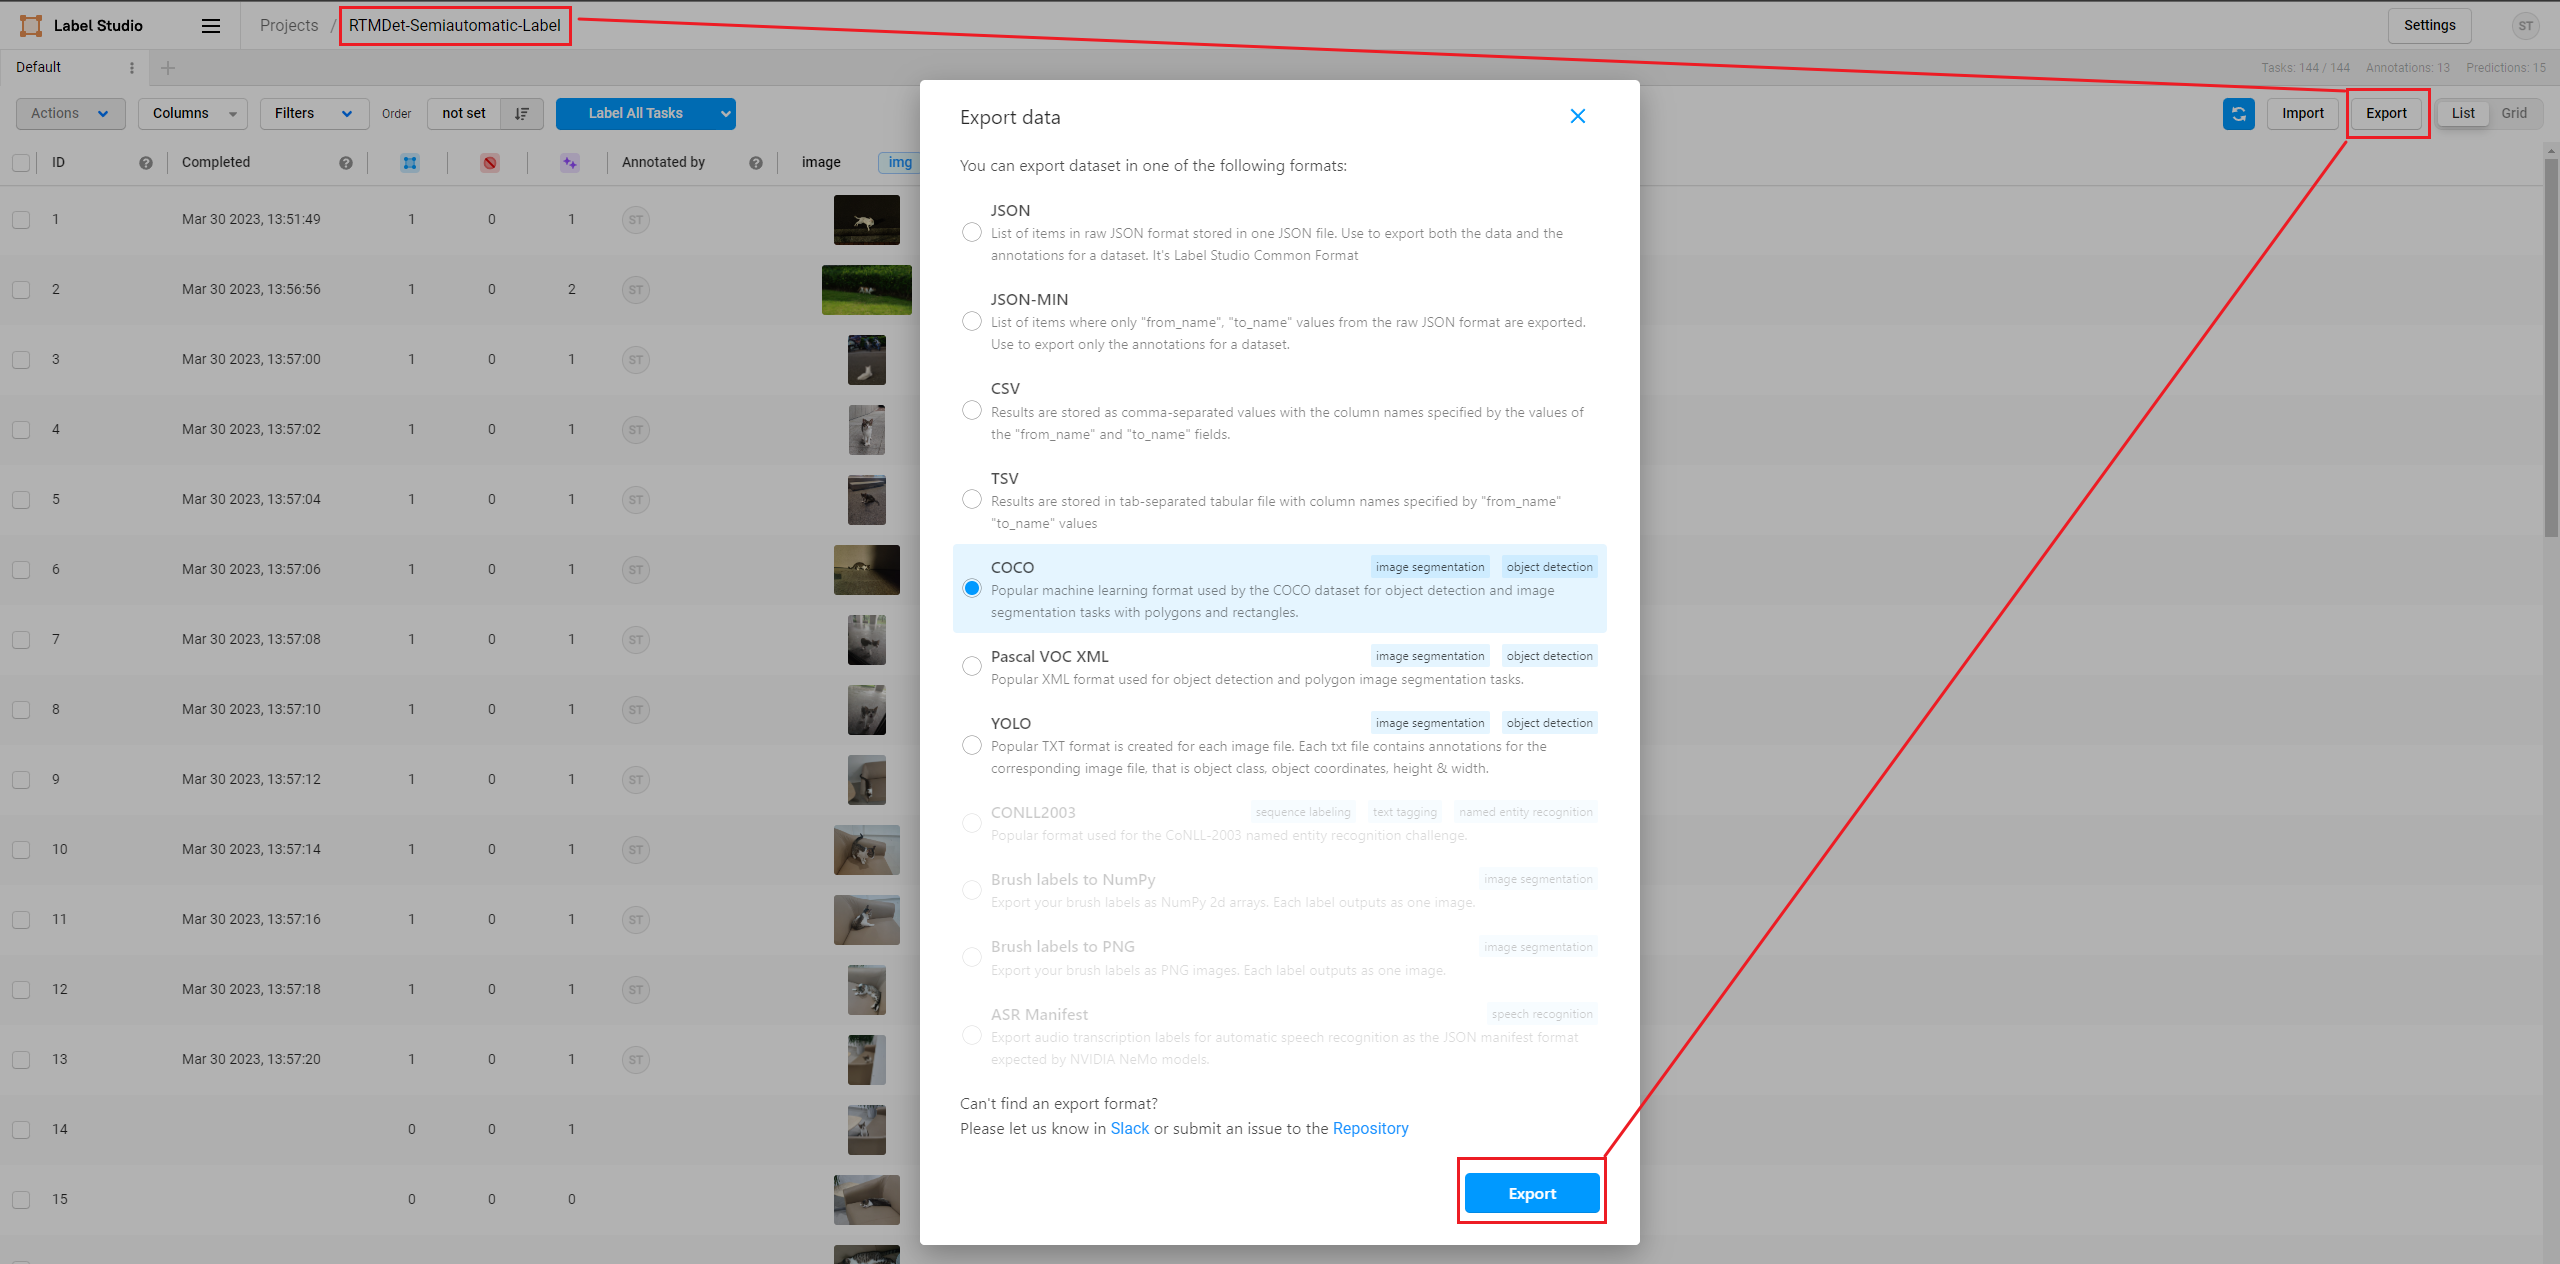
提交所有图像后,点击“导出”以将标注数据集导出为 COCO 格式。
使用 VS Code 打开解压缩的文件夹以查看标注数据集,其中包括图像和 JSON 格式的标注文件。
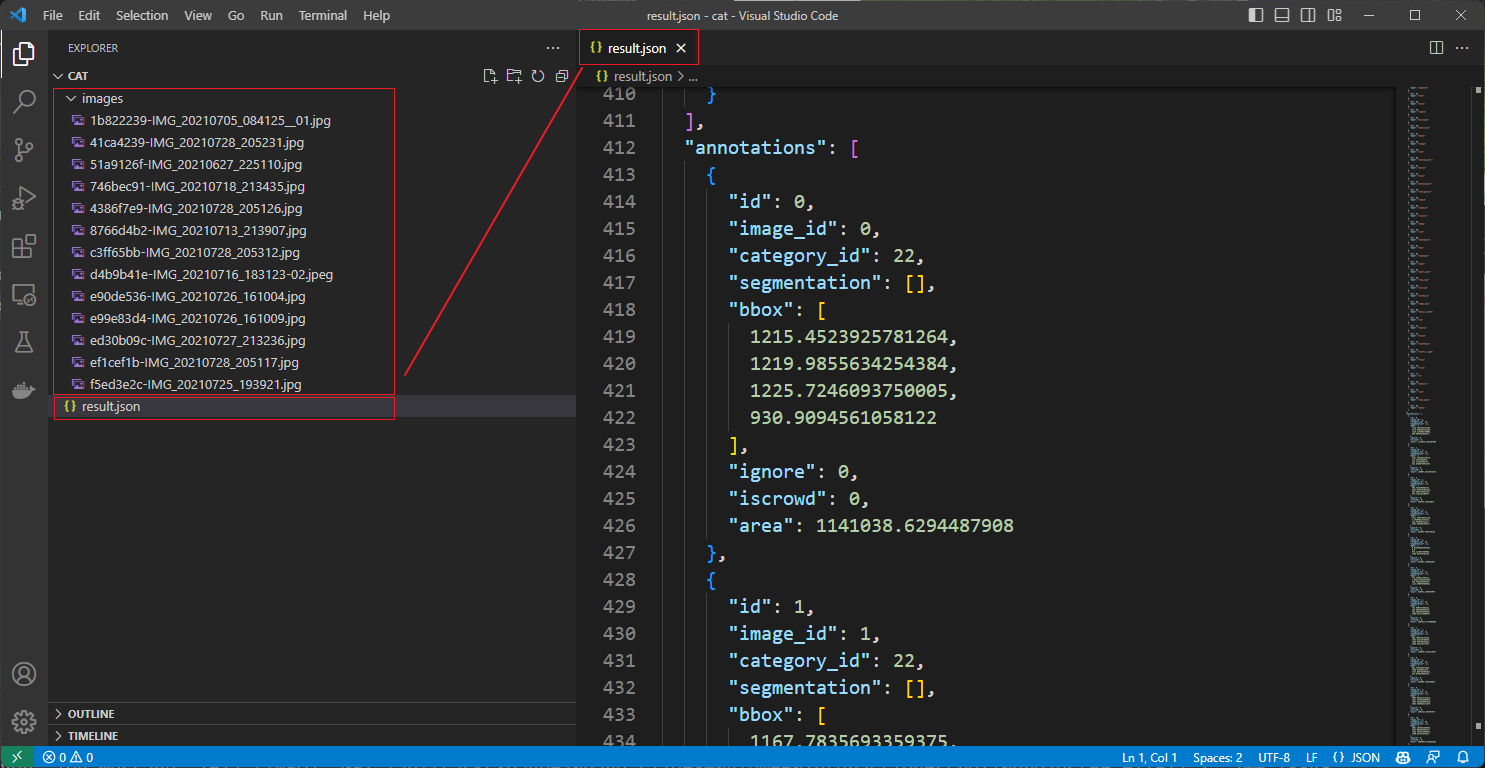
至此,半自动标注已完成。我们可以使用此数据集在 MMDetection 中训练更准确的模型,然后使用此模型对新收集的图像继续进行半自动标注。这样,我们可以迭代地扩展高质量数据集并提高模型的准确性。
使用 MMYOLO 作为后端推理服务
如果您想在 MMYOLO 中使用 Label-Studio,您可以在启动后端推理服务时参考将 config_file 和 checkpoint_file 替换为 MMYOLO 的配置文件和权重文件。
cd path/to/mmetection

label-studio-ml start projects/LabelStudio/backend_template --with \
config_file= path/to/mmyolo_config.py \
checkpoint_file= path/to/mmyolo_weights.pth \
device=cpu \
--port 8003
# device=cpu is for using CPU inference. If using GPU inference, replace cpu with cuda:0.
旋转目标检测和实例分割仍在开发中,敬请期待。